
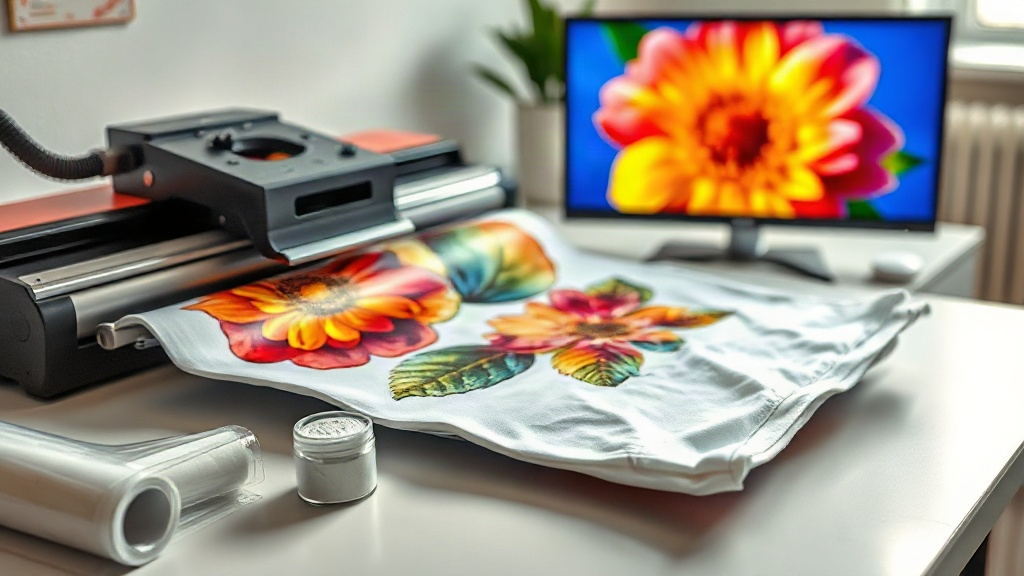
If you've been exploring custom apparel printing, you've likely encountered the term DTF. Short for Direct-to-Film, this technology is transforming how creators and businesses produce vibrant, durable designs on fabrics. Unlike traditional methods that require specific materials or complex setups, DTF printing offers a streamlined approach that works on almost any fabric. In this guide, we'll walk you through the essentials of DTF printing, from its mechanics to practical tips for achieving professional results.
What Exactly is DTF Printing?
DTF printing is a digital printing process where your design is printed onto a special film, coated with adhesive powder, and then heat-pressed onto the fabric. The magic lies in its simplicity: you print, powder, cure, and press. No weeding, no masking, and no need for specialty fabrics. Whether you're working with cotton, polyester, blends, or even leather, DTF transfers adhere beautifully. This versatility makes it a favorite among small business owners, hobbyists, and anyone looking to create custom t-shirts, hoodies, tote bags, and more.
The Science Behind the Process
The DTF process involves several key steps. First, your design is printed onto a PET film using specialized DTF inks. These inks are pigment-based and formulated to be flexible and durable. After printing, a thermoplastic adhesive powder is applied to the wet ink. The powder sticks to the ink and is then melted using a heat source, creating a strong bond. Finally, the transfer is placed onto the fabric and heat-pressed, where the adhesive bonds with the fibers. The result is a soft, stretchable print that withstands washing and wear.
Why DTF Printing Stands Out
Compared to other printing methods like screen printing or DTG (Direct-to-Garment), DTF printing offers unique advantages. For starters, it eliminates the need for color separations or screens, making it cost-effective for small batches and complex designs. You can print full-color images with gradients, fine details, and even photographic elements without worrying about color limitations. Additionally, DTF transfers can be applied to a wide range of fabrics, including those that are difficult to print on directly, such as nylon or leather.
Another standout feature is the durability. When properly applied, DTF prints resist cracking, peeling, and fading. They stretch with the fabric, making them ideal for athletic wear and garments that require flexibility. Plus, the process is relatively clean and straightforward, requiring minimal specialized equipment compared to other methods.
Getting Started with DTF Printing
If you're eager to try DTF printing, here's a step-by-step overview to help you get started. Remember, practice makes perfect, so don't be discouraged if your first attempts aren't flawless.
1. Design Your Artwork
Create your design using graphic software like Photoshop, Illustrator, or free alternatives like GIMP or Inkscape. Ensure your design is mirrored (flipped horizontally) before printing. This is crucial because the transfer will be pressed face-down onto the fabric. Pay attention to resolution: aim for at least 300 DPI for crisp, professional results.
2. Print on DTF Film
Load your DTF film into a compatible printer. Many beginners start with converted Epson printers using DTF ink systems. Print your design onto the film's coated side. The film typically has a matte side (for printing) and a glossy side (for handling). Be sure to print on the correct side to avoid ink smudging.
3. Apply Adhesive Powder
While the ink is still wet, sprinkle DTF adhesive powder evenly over the printed area. Gently shake off excess powder. You want a light, uniform coating. Too much powder can lead to a stiff feel, while too little may result in poor adhesion.
4. Cure the Powder
Use a heat gun or a curing oven to melt the powder. The powder should turn from white to clear and glossy. This typically happens around 320°F (160°C). Be careful not to overheat, as it can damage the film. A infrared thermometer can help you monitor the temperature.
5. Heat Press the Transfer
Set your heat press to the recommended temperature (usually 325°F to 350°F) and pressure. Place the transfer face-down onto your fabric, cover with a protective sheet (like parchment paper or Teflon), and press for 10-15 seconds. Let it cool completely before peeling off the film. For a softer feel, you can peel while warm, but cold peel often yields better detail.
Common Challenges and How to Overcome Them
As with any craft, DTF printing has its quirks. Here are a few common issues and their solutions:
- Ink smudging: Ensure you're printing on the correct side of the film and that your printer settings are optimized for DTF ink.
- Powder not sticking: Work quickly while the ink is wet. If the ink dries, the powder won't adhere. Also, check that your powder is fresh and dry.
- Cracking after washing: This usually indicates insufficient pressure or temperature during heat pressing. Increase pressure and ensure even coverage.
- Faded colors: Use high-quality DTF inks and store prints away from direct sunlight. Also, avoid over-curing the powder.
With a bit of experimentation, you'll find the sweet spot for your equipment and materials.
Applications and Creative Possibilities
DTF printing opens up a world of creative opportunities. Beyond t-shirts, you can decorate hoodies, caps, aprons, pillowcases, and even shoes. It's perfect for personalized gifts, team uniforms, promotional items, and limited-edition apparel. Because the transfers are thin and flexible, they work well on both light and dark fabrics without a white underbase (though a white underbase can enhance opacity on dark garments).
Many entrepreneurs use DTF printing to launch clothing brands with minimal overhead. You can print on demand, offering a wide range of designs without holding inventory. The low startup cost and ease of use make it an attractive option for side hustles and full-time businesses alike.
Frequently Asked Questions
What fabrics work best with DTF printing?
DTF transfers adhere to almost any fabric, including cotton, polyester, blends, nylon, leather, and even some treated woods. However, for best results, avoid fabrics with heavy coatings or finishes that may repel the adhesive.
How long do DTF prints last?
When applied correctly, DTF prints can last as long as the garment itself. They withstand dozens of washes without significant fading or cracking. To prolong life, wash inside out in cold water and avoid harsh detergents or high heat drying.
Can I use a regular iron instead of a heat press?
While a heat press is ideal for consistent results, you can use a home iron in a pinch. Set it to the highest temperature without steam, apply firm pressure for 30-45 seconds, and repeat if necessary. However, achieving even pressure and temperature is challenging, so a heat press is recommended for professional quality.
Is DTF printing cost-effective for small batches?
Yes, DTF printing is very cost-effective for small batches because there are no setup fees or minimum order quantities. You only pay for the materials you use, making it perfect for one-off designs or testing new products.
What equipment do I need to start DTF printing?
You'll need a printer compatible with DTF inks (many use converted Epson models), DTF film, adhesive powder, a heat gun or curing oven, and a heat press. Additionally, design software and a computer are essential. Start with a basic setup and upgrade as you grow.