
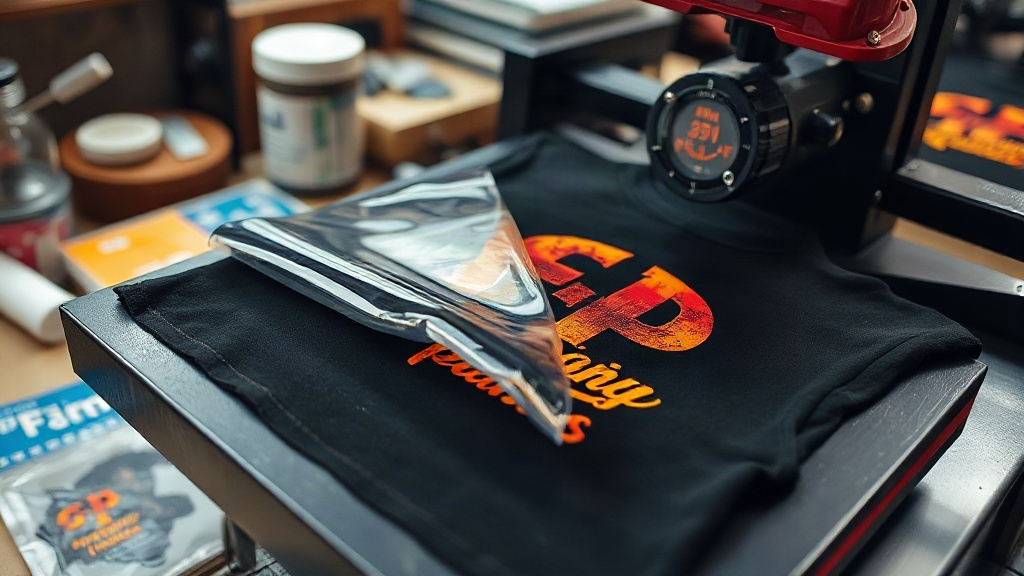
When you first hear about DTF printing, it might sound like just another industry acronym. But for anyone who customizes apparel, from a small print shop owner to a weekend crafter, DTF (Direct to Film) has become a game-changer. Unlike methods that require special papers or pre-treated fabrics, DTF lets you transfer intricate designs onto almost any color or material with remarkable durability. In this guide, I'll walk you through the entire process, share practical tips I've picked up from countless prints, and help you avoid common pitfalls. Whether you're considering adding DTF to your workflow or just want to understand the buzz, you'll find everything you need to get started.
What Exactly Is DTF Printing?
DTF stands for Direct to Film. It's a printing method where your design is printed onto a special PET film using water-based pigments, then coated with a hot-melt adhesive powder. After curing, the film is pressed onto the fabric with a heat press. The magic happens when the adhesive melts, bonding the ink to the fabric fibers. This differs from DTG (Direct to Garment), which prints directly onto the shirt, and from vinyl, which requires weeding and layering. DTF shines because it works on cotton, polyester, blends, and even tough materials like canvas or denim. Plus, the colors pop on both light and dark garments without needing a white underbase, which is a common headache in DTG.
Why Choose DTF Over Other Methods?
If you've tried screen printing, you know the setup costs and color limitations. DTG is great for cotton but struggles on synthetics. Vinyl is fine for simple shapes but a pain for detailed artwork. DTF bridges these gaps. You can print photographic images, gradients, and fine lines with ease. The film transfers are flexible, stretch with the fabric, and resist cracking. I've washed DTF-printed shirts dozens of times, and the design still looks fresh. Another advantage: you can prepare transfers in advance and store them, so you're not tied to printing on demand. For small businesses, that means faster turnaround and less waste.
Step-by-Step DTF Printing Process
Getting a great DTF transfer involves several stages. Let's break it down.
1. Design Preparation
Start with your artwork in a vector or high-resolution raster format. Mirror the image horizontally before printing. This is crucial because the transfer is flipped when pressed. Most RIP software for DTF printers will handle mirroring automatically, but always double-check. Also, consider the fabric color: if you're pressing onto a dark shirt, you'll need a white ink layer behind the colors. DTF printers typically print white ink first, then CMYK, so the design remains opaque.
2. Printing onto Film
Load your DTF film into the printer. The film has a coated side that receives the ink; the matte side is usually the print side. Make sure you're printing on the correct side. Use a printer designed for DTF or convert an Eco-solvent or pigment printer with DTF inks. The print will look dull and wet initially; that's normal. You'll see the white layer underneath the colors.
3. Applying Adhesive Powder
While the ink is still wet, sprinkle hot-melt adhesive powder evenly over the printed area. Gently shake off the excess. The powder sticks only to the wet ink. Then, cure the film in an oven or with a heat gun until the powder melts and becomes glossy. This step is critical: under-curing leads to poor adhesion; over-curing can make the film brittle. Follow the powder manufacturer's temperature and time recommendations, usually around 160°C (320°F) for 2-3 minutes.
4. Heat Pressing the Transfer
Set your heat press to the recommended temperature, typically 150-160°C (300-320°F). Place the garment on the platen, position the DTF transfer with the printed side down, and press for 10-15 seconds with medium pressure. Let it cool completely before peeling the film. You can peel it warm or cold, but cold peel gives cleaner edges. After peeling, a second press for 5-10 seconds with a Teflon sheet protects the design and improves wash durability.
Choosing the Right Supplies
Not all DTF films and powders are created equal. Here's what to look for:
- Film: Opt for double-sided matte or glossy PET film. Thicker films (75-100 microns) handle heavy ink loads better and reduce curling.
- Ink: Use high-quality DTF pigment inks. Cheap inks may clog printheads and fade quickly.
- Powder: Fine-grade TPU hot-melt powder (80-200 microns) works best. It should be stored in a dry container to prevent clumping.
- Heat press: A reliable press with accurate temperature control is essential. Irons are not recommended due to uneven pressure.
I've tested several brands, and consistency matters more than price. Buy from reputable suppliers who provide technical data sheets.
Common DTF Problems and How to Fix Them
Even experienced printers run into issues. Here are solutions to frequent headaches:
- Transfer peels off after washing: Usually caused by insufficient pressure, low temperature, or under-cured powder. Increase pressure, verify temperature with an infrared gun, and ensure powder is fully melted.
- Colors look faded: Might be due to wrong ink profile or too little ink. Check your RIP settings and ensure white ink is properly layered.
- Film curls during printing: High humidity or static can cause this. Store film in a dry place and use an anti-static mat.
- Clogged printhead: Regular cleaning and using fresh ink prevent clogs. Never let the printer sit idle for weeks without printing a test pattern.
Keep a log of your settings for each fabric type. What works for cotton may need tweaking for polyester.
DTF vs. Other Printing Methods: A Quick Comparison
To help you decide, here's how DTF stacks up:
- DTG: Best for 100% cotton, but requires pre-treatment and struggles on dark colors. DTF works on almost any fabric without pre-treatment.
- Screen printing: Cost-effective for large orders, but setup is time-consuming and not ideal for full-color designs. DTF excels at detailed, multi-color prints in small batches.
- Vinyl: Great for simple text and shapes, but layering multiple colors is tedious. DTF handles complex art in one press.
- Sublimation: Only works on polyester and light-colored fabrics. DTF adheres to cotton and dark materials.
Each method has its place, but DTF offers unmatched versatility for custom apparel.
Tips for Long-Lasting DTF Prints
To ensure your DTF transfers survive repeated wear and washing:
- Wash garments inside out in cold water.
- Avoid fabric softeners and bleach, which degrade the adhesive.
- Tumble dry on low or hang dry.
- If ironing, use a low setting and place a cloth over the design.
- Wait 24 hours after pressing before the first wash to let the adhesive fully set.
Following these steps, your prints can last as long as the garment itself.
Frequently Asked Questions
What fabrics can I use with DTF printing?
DTF works on a wide range of materials, including cotton, polyester, blends, canvas, denim, and even leather. It's particularly useful for dark or colored fabrics where other methods might fail.
Do I need a special printer for DTF?
You can use a dedicated DTF printer or convert an existing Eco-solvent or pigment printer by using DTF inks and film. However, dedicated printers are optimized for the process and often yield better results with less trial and error.
How long does a DTF transfer last?
With proper application and care, a DTF transfer can last 50+ washes. The key is correct curing, pressure, and following wash instructions. Avoid harsh chemicals and high heat.
Can I layer DTF transfers?
Yes, you can layer DTF transfers, but it's tricky. Press the first transfer, peel, then press the second on top. Use a lower temperature for the second press to avoid disturbing the first layer. Alternatively, design your artwork to include all elements in one transfer.
Is DTF printing cost-effective for small businesses?
Absolutely. The ability to print on demand, store transfers, and use them on various fabrics reduces inventory waste. While startup costs for a printer and supplies exist, the per-print cost is competitive, especially for small to medium batches.